Water heaters are some of the hardest-working appliances in any home. They keep your showers warm and your laundry running daily. But when they fail, it immediately disrupts your routine. Common signs of trouble include odd noises, lukewarm water, or a complete shutoff.
Starting with a quick thermostat check is often an easy first step. However, this article goes further. This guide will walk you through five essential, step-by-step methods to fix your water heater. We will help you manage issues from inconsistent water temperatures to minor leaks. Use these instructions to resolve the problem yourself, and learn exactly when it is time to call a trusted local expert, like New Flow Plumbing, before the situation worsens.
Common Signs Your Water Heater Needs Repair
Before you dive into fixes, it helps to know what signs suggest something’s wrong. A few symptoms of a struggling water heater include:
- Lukewarm or no hot water
- Water that’s too hot, even on low settings
- Unusual banging or popping noises
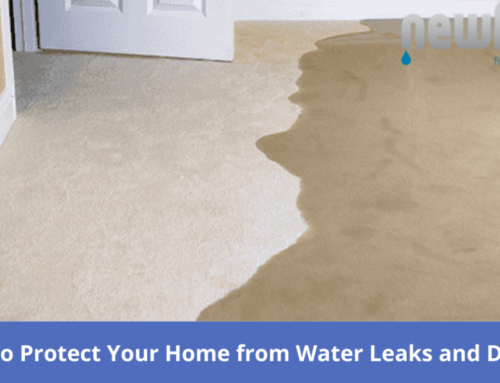
- Leaking water from the tank or connections
- Rust-colored water
- Bad-smelling water
- Pilot light keeps going out
These signs point to issues that range from minor valve problems to serious safety concerns. The sooner you take action, the less likely you’ll end up with a flooded utility room or dangerous pressure buildup.
Safety First: What to Do Before Fixing Anything
No matter how confident you are, always start by shutting off the power and water supply. This protects both you and your home.
For electric heaters:
- Turn off the power at the breaker box.
For gas heaters:
- Turn the gas control to “pilot” or shut off the gas valve completely.
Then shut off the cold water supply valve located above the tank. If you’ll be draining the tank or opening any valves, wait for the water to cool down before starting to avoid burns.
Fix 1: Secure or Replace the In-Line Valve Nut
If your water heater is leaking from the top or side, the culprit could be a loose ball valve or in-line valve nut. These small connections control water flow into the tank and can loosen over time due to pressure changes or vibrations.
How to fix it:
- Use an adjustable wrench to tighten the nut gently.
- Wipe the area dry and monitor for any new leaks.
- If the leak continues or worsens, shut off the water and replace the valve entirely.
You can find universal replacement valves at most hardware stores. Be sure to bring the old one or snap a picture for reference. It’s a fairly quick fix that can prevent gallons of wasted water and potential flooding.
Fix 2: Adjust Your Water Heater Thermostat
One of the most common problems homeowners face is water that’s too hot or too cold. The good news? It’s often just a thermostat issue—especially during seasonal temperature swings.
Here’s how to fix it:
- Locate the thermostat panel on the side of your water heater.
- Remove the cover with a screwdriver.
- Use a flathead to adjust the dial to around 120°F.
- Wait several hours, then test your hot water.
Setting your thermostat to 120°F is ideal for safety and energy efficiency. If your home needs hotter water – such as for sanitizing dishes – 140°F is still considered safe for adults. Just be cautious if you have young children or seniors in the home.
Fix 3: Replace a Faulty Thermocouple
If you have a gas water heater and the pilot light won’t stay lit, the thermocouple might be bad. This part detects the pilot flame and signals the gas valve to stay open. When it fails, your heater won’t turn on—even if the gas is flowing.
Steps to replace it:
- Turn off the gas and water supply.
- Remove the burner access panel.
- Unscrew the thermocouple and disconnect it from the burner.
- Attach the new thermocouple in the same position.
- Reconnect everything and test your pilot light.
Thermocouples are inexpensive and can be replaced with basic tools. This fix is often quicker and cheaper than calling a pro—and can get your hot water back in just an hour or two.
Fix 4: Check or Replace the Pressure Relief Valve
Every water heater has a temperature and pressure relief valve (T&P valve). This part is essential for safety—it prevents the tank from exploding if pressure builds too high. If this valve fails, your water heater could be at serious risk.
Here’s how to check it:
- Shut off power or gas to the water heater.
- Locate the T&P valve—usually on the side or top of the tank.
- Place a bucket underneath and gently lift the valve’s test lever.
- If water flows out and then stops when closed, it’s working.
- If nothing happens or it keeps leaking, it’s time to replace the valve.
Replacement T&P valves are easy to install and relatively cheap, but they play a critical role in keeping your home safe.
Fix 5: Increase Gas Pressure or Clear the Burner
If your water heater takes forever to recover after someone showers—or if it runs out quickly—there could be gas pressure issues or a clogged burner orifice. This is common in older heaters or homes with dusty utility spaces.
How to address it:
- Shut off the gas and open the burner compartment.
- Look for signs of soot, dust, or rust around the burner.
- Gently clean it with a vacuum or soft brush.
- If the burner looks clean, the gas pressure may need adjusting.
Increasing gas pressure should only be done by a licensed technician. However, cleaning the burner is a safe first step and often solves the issue.
When You Should Consider a New Water Heater
While most water heater problems can be fixed with simple parts or adjustments, some signs mean it’s time to replace the unit, such as:
- Rusty water coming from hot taps
- Tank leaks from the bottom
- Heater is over 10–15 years old
- Repeated failures even after repairs
- Extremely high energy bills
A new unit may cost more upfront, but it will save you money and frustration over time—especially with modern energy-efficient models.
Preventing Future Water Heater Problems
Want to avoid cold showers and costly repairs down the road? These easy maintenance tips will extend your heater’s life:
- Flush the tank every 6–12 months to remove sediment.
- Check the anode rod once a year (it helps prevent corrosion).
- Test the T&P valve regularly.
- Inspect connections and valves for leaks or rust.
- Keep the area around the tank clean and dust-free.
If you follow these steps, you’ll reduce the risk of surprise breakdowns and save money on emergency fixes.
Final Thoughts: Hot Water, Hassle-Free
Dealing with water heater problems can be annoying, but many common issues are simple to solve on your own. Whether you’re tightening a loose valve, adjusting your thermostat, or swapping out a faulty thermocouple, each step gets you closer to stress-free, reliable hot water.
Still unsure or feel like something’s not right? Don’t wait until a minor issue turns into a full-blown leak or safety hazard. Call a trusted local expert who can quickly diagnose the problem and recommend the right solution.